Friday, April 25, 2008

Now it's done.


I did pull out the sleeve yesterday, ripped back to 1" below the armhole and reknit it. I kept comparing it to the other one, which I thought was fine. It seemed to be coming out pretty close. (I listened to Jane Eyre while doing this, which was great.) I sewed it in and, folded the sweater in half to compare the sleeves and now the one that was too big is at least an inch or inch and a half shorter than the other one. Yikes. I thought I might have to do it again! But I tried it on and the shorter sleeve was perfect. The longer sleeve is only a bit too long and may be fine. I actually wore the sweater today. I don't let my new garments sit around. Afterall it is wool and summer is coming. Fortunately I live in Duluth where one can wear wool 10 months of the year. It was perfect for today. I still feel a little ridiculous taking my own picture in my bathroom, but it's the only room in the house that has enough natural light that I don't need the flash. And the sweater just looks so flat if I lay it down to take a photo. And I don't own a dress dummy, so I had to resort to taking my own picture as best I could. Oh and my husband is out of town. So you get a funny picture of me in my bathroom. :-0


Thursday, April 24, 2008

The Freya is finished - well almost


So I got this sweater done and sewed up, but now I see that I must redo one sleeve. That same first sleeve that I already redid the top part of. I think you can see in the picture how that sleeve is just too big. Other than that it seems fine.


I'll post a better picture after I get the sleeve fixed. It's a gray, rainy day here today, so a good day to put on an audio book and sit and pull out a sleeve.


Friday, March 28, 2008

Rosemaling

I have just finished an 8-week rosemaling course. It met on Thursdays for 8 weeks. I missed two weeks because I was traveling, but I did do some painting.

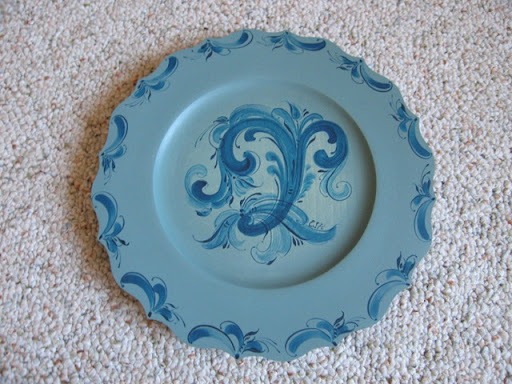
aqua-plate

Here are the things I painted in this class. Rosemaling is Norwegian folk painting, that is normally done on wood. It can be done on other surfaces, but wood is the most common one. I, however don't feel I'm good enough to paint on a lot of wooden objects. I am still practicing and learning, so I do a lot of painting on paper. sometimes if the design turns out well I scan it and make cards from it. So during this class I painted many designs on paper as well as 3 wooden plates.

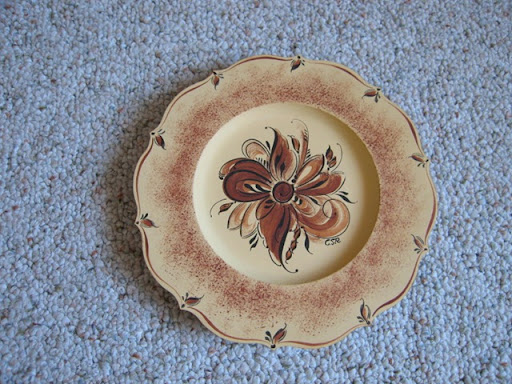
 cream-plate I paint free-hand and my designs are my own. Many rosemalers, especially at the level I paint trace designs or sketch out designs before they start, but I'm just too lazy to do it that way. This is a 6-inch plate.


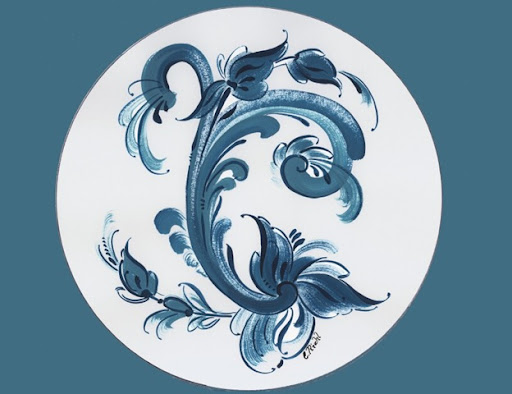
blue-circle-card This is one I did on paper, scanned and added the outer color on my computer, to use as a card. This is the extent of my photo-enhancing skills.


brown-plate This is a 7-inch wooden plate.


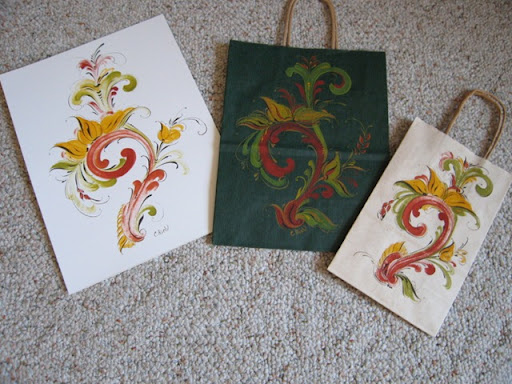
I did these three yesterday. The teacher had left a sketch on the board from the previous day's class and I used that as inspiration for this design, which I did three times with ththree bagse same colors, but slight variations in the design. I cannot do 2 identical designs.


blue-nils-e 


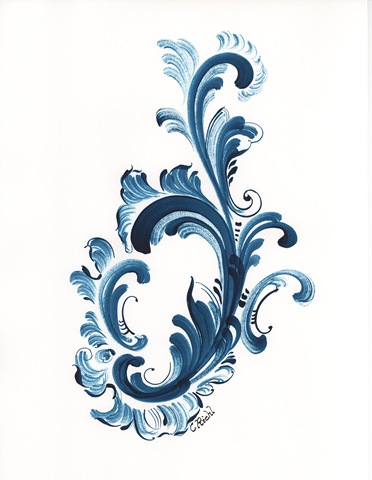
Finally, this is inspired by a painted sketch done by Norwegian rosemaler Nils Elingsgard. 

Friday, March 7, 2008

Back to the Freya

I am making progress on this Elsebeth Lavold design, which I thought was called Freja, but now I see it is spelled Freya. I think it's pronounced the same either way. Here's where I am with it now.

I have completed both sleeves. I had to rework the top of the first sleeve, because it was coming out way too long, but it seems okay now and I did the second one the same way. The sleeves are fairly skinny, but I tried them on and they will be fine, I think. Then I picked up the stitches of my gauge swatch and did the cable motif to practice it. I had never done this type of cable with the starts and stops, so I thought it would be good to see if it was going to give me problems before I cast on for the front. I did it twice to be sure I had it.

I love the charts for cable knitting. I haven't used charts for cables before, but I find it so straight-forward. The symbols on the charts are very logical. I had to read the definitions the first time, but then was able to follow without referring again to the definitions except for the decreases. Those I had to check again, because some are done on the back (reverse) side and those require some thinking. I think I have it now. This has been fun and I hope it turns out nicely when I am done.

Monday, March 3, 2008

Mystery shawl - clue #3

Here's what the shawl looks like this morning. I finished clue 3 over the weekend. I'm sorry this isn't a very good picture. I'll try to get a better one after the next clue.


The pattern this time got pretty complicated in the middle and was hard to follow, so I added vertical lines with different colored markers to the printed pattern. This helped me remember where I was on the pattern. That helped a lot. I have used 2 markers one in each side of the triangle. When I put in the life lines they go through the markers, so I drop them on the next row and put in new ones. I forgot one of the new ones the last time, but that explains why there are 2 next to each other on the right side in the photo, in case you were wondering. :-)

Friday, February 29, 2008

Freja

Well, since it is not taking me all week to finish the "clues" for the shawl I needed another knitting project. I started this sweater called Freja. It's designed by a Swedish Woman named Elsebeth Lavold. I bought her book Viking patterns for knitting, which has this pattern in it. I also bought the yarn the shop recommended, so this is a totally new project, not from my stash. My stash currently has 2 different yarns in it. I was looking for a cardigan to use one of the yarns from my stash, but found this instead. I'm clearly not a skilled stash builder. I've heard others say they don't know how a knitter does not accumulate a stash. Well I don't know how anyone keeps buying stuff they won't be able to get to for over a year. I don't know. I'm just different. I normally have only one project on my needles at once and I don't have a significant stash. Here is the first sleeve of this sweater and part of the second. I decided to start with the sleeves, because that's a good way to check the gauge. I did swatch, but I find that is often not enough.

I had to rip back a few inches and rework the top of the sleeve, because the cap was clearly coming out too long. I think my row-gauge is longer than hers. She doesn't give any measurements for the sleeve cap, just says to keep going until you have 26 stitches or something like that. Well, by the time I had only 26 stitches my sleeve cap was way too long, so I riped back to about the mid-point and started decreasing 2 stitches each row instead of 2 every other row. I was afraid the sleeve seemed too skinny, so I sewed it up and tried it on. It's okay. The photo in the book shows a skinny sleeve, so it's supposed to be that way. I tried it on over my turtle-neck shirt and it's going to be fine. This yarn is Elsebeth Lavold's Silky Wool- a blend of wool and silk - duh. It actually feels a bit like cotton.

Tomorrow the next clue for the shawl comes out, so i'll work on that again this weekend before I go back to this. I don't think I'll be knitting tonight as I'm going skiing tonight.

Monday, February 25, 2008

Clue Number 2

I finished clue 2 on the same day it was posted! I counted and counted stitches on every row. I realized that the center of certain motifs needed to appear above the center from rows before. It was hard to tell where the motif should start, but when I got to the center I could tell if I was in the right place or not. At that point I would keep going or tink (unknit ('knit' backwards)) to where the mistake was made. I tinked 6-16 stitches 3 or 4 times. This was so much easier that undoing entire rows.

So here's what it looks like now.


Besides learning to knit lace I also learned (with the help of very kind people in the knit-along-Thanks Carla and others)) how to increase the size of the chart and print it in Adobe Reader, so that I could write numbers in the little squares. This was very helpful. The chart has long sequences of knit stitches between the motifs. The numbers are different for every row and across the rows, so I sit down and count all these spaces before I begin and write the number in each section. So when I knit they have already been counted and I just read the number from the chart where I've written it in. This is another trick I learned that speeded up the knitting tremendously.